
My very first superhero costume was a ROGUE suit which I had commissioned. It was okay but I had hoped for better. It wasn’t exactly the right shades of green or yellow that I wanted and the color blocking was done in a way that looked like it been pieced together with scraps or at best, used as little yardage as possible. I use a lot of fabric for a suit my size because I would rather have larger pieces cut on the fold than a bunch of seams from small pieces stitched together; just my preference for the best looking suit possible. I’m only 5’2″ and a standard full length bodysuit like this requires 2.5 yards of the main color fabric for my size. Whenever I’m quoting someone on a price, I explain this. I also order at least a half yard extra because 60″ width is not always 60″.
This version debuted in 2009 at Comic Fusion’s Free Comic Book Day celebration. As I also explain quite often, I take things from the comics/cartoons and make changes to them to come up with my own design. Some people like this while others don’t. I happen to prefer not having an identical suit to anyone else and I also love the designing process because it’s a rare time when I get to be creative. For this suit, I wear brown boots, not yellow; I don’t wear the headband; I also don’t have the double belt although that is one canonical element I would like.
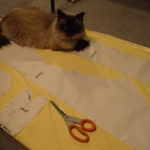 Like most of my costumes, I started with the Kwik Sew figure skater pattern, #3052. I modified the heck out of it to establish where the color blocking would be.
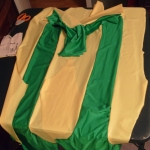 Cutting out the color pieces. This is my favorite kind of fabric, Milliskin Spandex 4-way stretch.
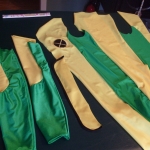 I had transferred it to muslin for my size and marked up my color blocking. Then I transferred those pattern pieces to paper (because that’s what I had and was out of muslin) in order to get all the pieces I needed for this design. Let me express how much I hate sewing on curves! I have a couple of spots that are little too pinched or gathered but it’s actually pretty good overall.
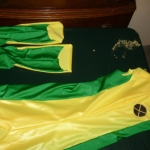 Assembling the pieces:
I usually start with the front & back center seams, then inner leg seams.
The collar’s stitching is actually a bit of a mess for getting that black bias tape in place. Luckily most of the problem stitching is on the inside. I also decided to put the zipper in the front which has two functions, one practical and one for kicks: the practical element is that a front zipper is easier to get out of; the other reason is because it can be unzipped enough for a sexier look.
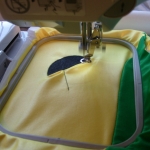 When I was able to get all my software to work properly (*grumble*) I was able to create my own 4″ embroidery designs for my Brother sewing machine.
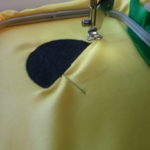 Rather than make a patch, I did the embroidery right on the suit.
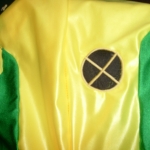 By putting the spandex through the embroidery, it began to make folds as it progressed but it’s not even noticeable in the final product. I also decided to make a full X logo using a black background and yellow “X” and circled edge; oftentimes Rogue’s logo is really just the black spaces and no “X” at all. I went for something cleaner looking plus adding an original touch.
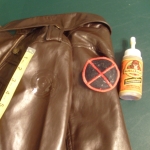 I made patches with the same embroidery pattern & just changed the yellow “X” to a red one.
 I found this jacket in the Juniors’ department of Burlington Coat Factory. I was happy to find pleather (polyurethane actually). Sometimes I do splurge on leather but as a vegetarian, I try to avoid it whenever I can.
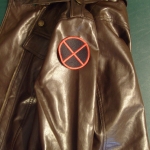 Gorilla glue expands and gets “foamy,” so don’t spread it all the way to the edges of anything. I also find that every kind of glue shows through fabric. I have no idea how to avoid this. Parts of the patch look shiny. I had a similar problem with getting the diamonds on my Harley suit.
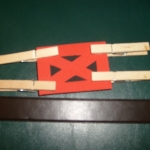 This is the belt buckle which I crafted out of foamie sheets. It’s just two layers of foamies; one in black, one in red – giving it the embossed “X” look. As it turns out, I was very lucky to have a friend from The Superhero Costuming Forum, from Max at TheWrapofCons, send me a wonderful plastic cast one instead. I love surprises! Max does amazingly wonderful work.
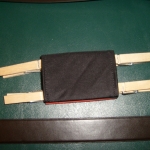 The back of my foamie belt buckle. The backing is a strip of black spandex for the belt to weave through.
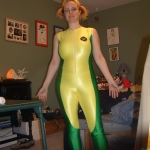 Fitting the suit before the sleeves were attached.
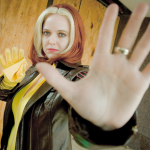
The wig came from one of my shopping binges online at Best Wig Outlet. It’s by Sepia, called “Ebony.”
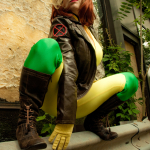
The boots are faux leather and I picked them up a long time ago at Famous Footwear. I happen to prefer the more practical brown knee highs which I can wear in normal everyday life rather than the thigh-high plastic yellow boots with green strappy things.
The gloves were an amazing find at a thrift store in their vintage room! They were only $4 because they were considered “lightly soiled.” I knew patience would pay off by shopping for pieces over time and waiting for just the right thing. I hate making gloves!
The belt is just something from my closet.
See the photoshoot I had with Trevor from Harmony Photo. Trevor is one of the very best photographers I’ve ever worked with; if you’re in need of his services in the central NJ area, tell him you heard about him from me and hopefully he’ll give you some great prices. You can follow Trevor at https://twitter.com/harmonyphoto.
9 Comments on Tutorial: Rogue (traditional)
Comments are closed.



This is probably my favorite costume of yours. The leather jacket and wig take the entire thing to a whole new level. Great job!
And I think the tutorials are such a cool idea; I’m sure there are a lot of costumers who appreciate having such detailed information available.
I LOOOOVEED!!!!! Good Job!!!
Amber- your tutorial is soo helpful!
I have a bunch of questions and if you have a minute to answer them- I would be so appreciative!
1- Did you use a standard sewing machine or an overlock/serger?
2- Did you press open the seams afterwards? I know doing that on nylon/spandex can ruin the fabric, but I’m stunned that I can’t see any of the seam allowances when you have the suit on!
3- You used a regular (plastic) zipper instead of an invisible zipper?
4- I know you modified the pattern and re-traced it (I believe), I take it you added side seams? The 3052 Kwik-Sew doesn’t have any, but for us curvy girls, side seams work in our favour. And you made a muslin sample? Using muslin or some other stock milliskin?
5- What tips do you have on adding the bias tape to the stand-up collar?
6- Did you dye the front of the wig? I didn’t know that was possible on synthetic!
Again, I am so impressed. Looking forward to your reply!
Stephanie
Hi, Stephanie! I’m glad the tutorial was somewhat helpful
1. I use a cheap Disney machine, standard sewing – it actually has an embroidery carriage but my software is no longer compatible with the latest Windows. I have an overlocking stitch setting for “ghetto serger” outcome.
2. I don’t normally press any spandex seams for fearing of burning. Once in a while I’ll have to press if I can’t get wrinkles out of a fabric but I put a piece of muslin between the iron and spandex then.
3. My zippers vary depending on what I can find! If I find the right length, I don’t always find the right color. I usually let color be the deciding factor so it’s either going to be a regular plastic one or an invisible one. I tend to fill out my suits these to the max so I don’t think an invisible would even look invisible if the flaps unfolded.
4. No side seams on this one.
5. I think this was my first attempt at bias tape. I pressed the ends under for a finished end; stitched the back/inside piece in place then folded it over and top stitched from the front.
6. That wig is not modified at all. The wig is called “Ebony” by Sepia brand. The old link I have for it says it’s no longer available though. Maybe a different site would have that brand. Other people buy two wigs and but them apart at the caps and stitch them together. For the last couple years I’ve just been spending a ton of money to have my real hair highlighted this way instead.
Thanks for the feedback!
Amber
Amber, your response was so helpful!
After much searching, I am getting there!
Fabric, pattern and wig purchased!
(Still searching for the jacket and gloves.)
I’m in the process of modifying the wig and pattern… unfortunately I don’t have time to drape a sample, so I’m adding the style lines on the pattern by hand and hoping for the best!
Thanks again,
Stephanie
Hello!
I love your costume, it came out perfectly. I was wondering what colors Milliskin spandex did you use and did you use matte or shiny? How difficult was this fabric to work with?
Thanks!
Paige
Hi, Paige
Thanks! All my details on it are on the old blog: http://herofashions.blogspot.com/2009/03/x-mens-rogue-v-20.html
I find it easy to work with because it’s all I know. Spandex doesn’t fray which makes me it easier but other people find it really challenging. I prefer it over things like linens and silk. This was the milliskin tricot shiny.
Hi i was wondering if you have a pattern online somewhere for this body suit. it looks great and ur tutorial is inspiring. please write back and let me know if it is
  thanks in advance – joe
Hi, Joe
I do not have patterns for sale.
amber