16-MAY-2012 This is the second MOCKINGBIRD costume I’ve had the privilege of making. The first was back in 2009. I thought I documented it at HeroFashions (on blogger) but because the suit was a commission for my friend Jen and she was going to debut it at a convention, the steps were never posted. I waited until I got her convention pictures and then made a short post about that. It was the same time Jill was a Rage Lantern with the Dex-Starr prop I helped her make. So even though I never got to go to SDCC, my work was there!
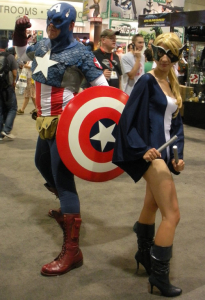
A few weeks ago someone on The Superhero Costuming Forum spotted one of Jen’s San Diego pictures in the vast photo library of costumes. Jen had courteously credited me with the bodysuit’s design and construction. Paul sent me an email to see if I could make a similar suit for his wife Marie. I am terrible about checking my SCF email through the boards so it was simply luck that it hadn’t been sitting there too long which would have made Paul seek help elsewhere.
Last week, everything I touched with my sewing machine was a disaster and I pretty much swore off doing commissions. I had an identical experience in 2011 and said I needed to stop for a while until my confidence and skills returned. Two days ago I had even tossed an almost completed suit into the trash; I fished it out the next day and maybe when I’m not in Hulk rage mode, I’ll rip out the stitches and fix it. This meant I was down right terrified to start Marie’s Mockingbird costume when the fabric arrived today.
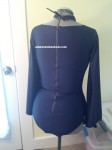
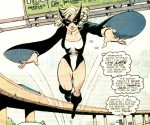 Right off the bat, my the draft of the pattern that had made on muslin was ruined when I looked at it upside-down and therefore confused the shoulder opening for the leg opening and cut it wider. When I realized what I had done, I threw the muslin pattern in the garbage and resorted to using the spandex mock up instead. It meant that there would be side seams which I was trying to avoid. It was something critical that I had to decide: to try and make a suit like Jen’s without side seams and hope it would come together properly OR use a pattern draft that had more pieces, more seams but was closer to the original figure skater commercial where this originated (Kwik Sew 3502). This time the fabric came from Spandex World, Milliskin Shiny Navy.

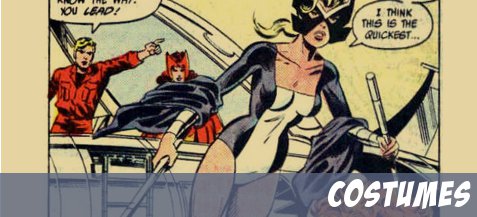
I love this classic style of leotard from the boom of comics. Mockingbird’s modern full bodysuit is gorgeous too but I haven’t tackled that one yet. I really enjoy the simpler ones when it comes to knowing my sewing limitations. According to ComicVine, Mockingbird aka Bobbi didn’t receive her first real costume until the Bronze Age of Comics and it was full bodysuit which looks like a fusion of the leotard – using the same style top half and bell sleeves – with the modern version that is full length. Today, in stead of a bird themed mask, Mockingbird wears beautiful amber goggles (much like my own) and more tactical accessories. As far as I know, Mockingbird is still happily part of the New Avengers. She’s also available in the Avengers Alliance video game.
Designing = 2 hours
Cutting = .5 hr
Sewing = 3.5 hours
6 Comments on Tutorial: Costume – Mockingbird (Marvel)
Comments are closed.





Looks rather well done, I applaud your work
Nice work! Any pics of it on a model? Be cool to see it ‘in action’.
Not yet. I just made it today!
Hello! I’m gonna start out by saying I love this costume and the way you did it! Would you be able to explain how you modified the original Kwik Sew pattern? I’m hoping to start a Mockingbird cosplay of my own, and as far as I can tell, this post is the best/most detailed description of how to do that. Also, what fabric did you use for the white? Thank you so much, and again, I love your work! 🙂
To modify the pattern, I take cheaper spandex and cut out the pieces as they’re called for in the pattern instructions. Then mock up the pieces as they would need to be and cut them along the new lines of where the color blocks would be. Use those pieces as the pattern then but remember to add half an inch around them for seam allowance.
The spandex I almost always use is called “milliskin.” I find that it’s not sheer and see-through like cheaper spandex.
Good luck!
Thanks so much! 🙂