THORIN OAKENSHIELD COSPLAY TUTORIAL: BELT BUCKLE
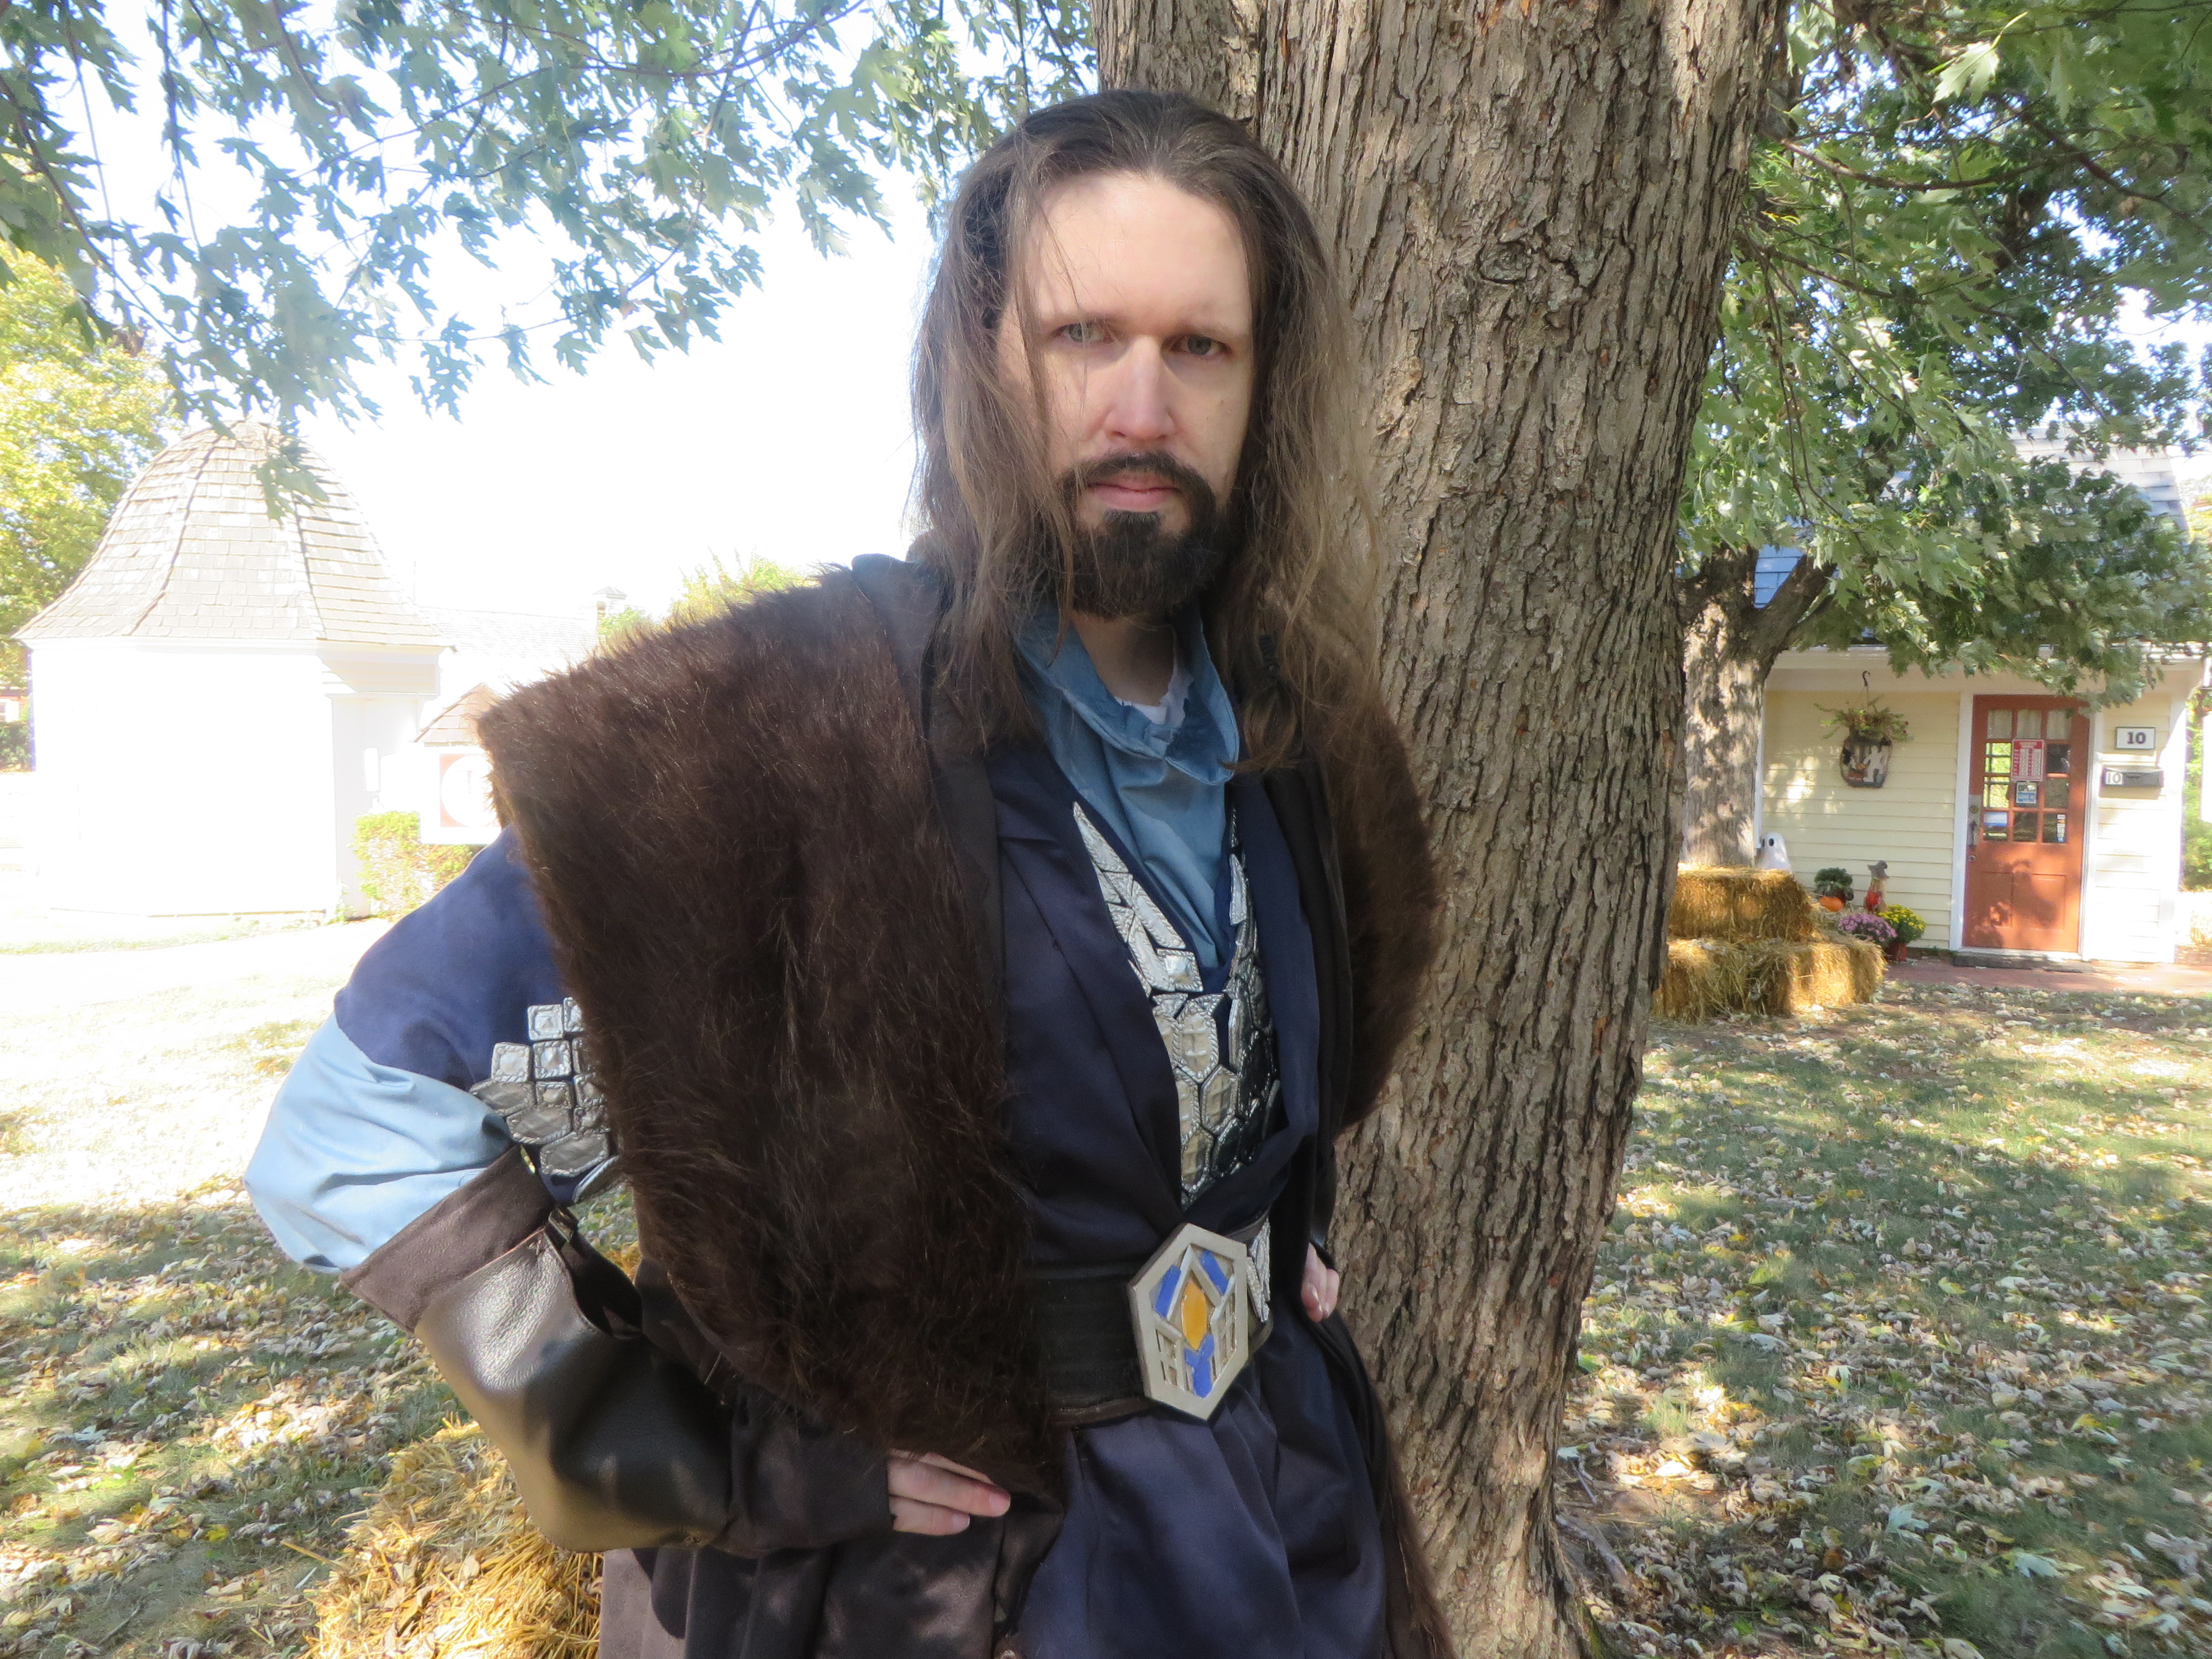
30-AUG-2015 Here’s another piece by Gotham R&D for us.
Prelude: The Waistbelt
The original belt that was sewn for me was a simple sash sewn from the same suede-like cloth that was used in the overcoat. It’s a great cloth to the touch and has the right general look this side of using a real strip of leather.
I created a simple template on graph paper to work out the angles and placement of the armor chips, which ultimately helped me pattern out just how many sections I would need to fill when dividing up the chips.
Part of the leather I bought for the bracers went into the details of the belt. The shoulder strap from the purse was cut lengthwise and glued carefully to the outer edge of the belt.
The straps were also cut at angles, flipping back and forth on the belt as the pattern was flipped up and down.
Step 1: Building the basic buckle
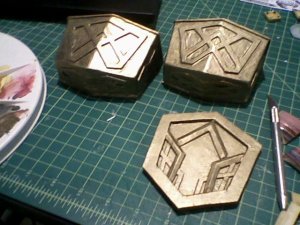
The belt buckle itself was a whole other story on the amount of work involved. Once again, I had to sketch out a pattern; and once I had the general shapes in place, I folded the pattern in half length-wise. This was to make sure I had the symmetry in place, since both sides were a direct mirror.
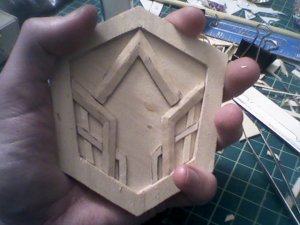
I used several layers of pine wood. Pine wood is slightly stronger than balsa, but still lightweight. This is the same wood I used to build the sword for Thorin, and in fact the belt buckle was made from scrap material. Pine wood has a defined grain pattern, or at least the sheets I used did. This helped with the sword for creating some gradual curves in the blade, but for the buckle it didn’t help. I didn’t want the buckle to arch or warp as it’s glued, so I laid the pattern out on the wood, so that when the sections were glued, I would have a cross grain to add strength.
Once the base was cut out, I began to trim down each part of the template and trace them out on the remaining scrap. There was also a plan to double up on the border of the buckle, and the same cross grain pattern was cut out and glued in.
Once all the parts were cut out, assembling them was like placing the pieces of a puzzle together. Gluing them was a bit of a trickier matter, however, as the clamps and such that I had couldn’t reach around the buckle very well. Some of the parts that were angled also proved to be difficult since they kept sliding around with the littlest pressure put on them.
Eventually, everything was glued in place. I then sprayed the whole belt buckle with black plasti-dip just in case the paint job didn’t work right. After the plasti-dip layer cured, I followed up with a silver spraypaint.
After the paint had tried, I followed back over with a tarnished silver paint into the corners, and then used a silver rub and buff on top of all the surfaces. The end result was passable, though never being fully settled with my work I will likely go back and work with the surface a little.
Step 2: Casting Gems
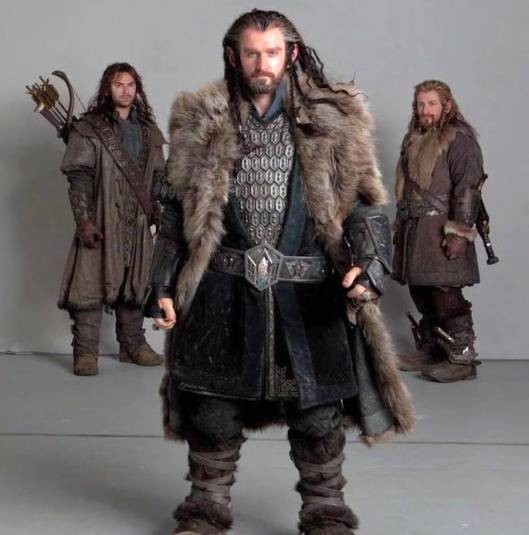
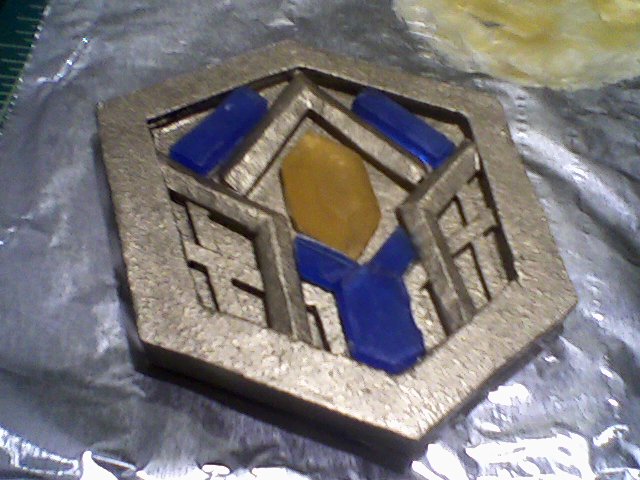
The next part was breaking new ground for me, as I needed to cast gems for the buckle for the right effect. There are basically 6 gems set in the buckle, five that look like sapphires and one that looks like a citrine. All the shots I could find make it look like a chunk of gold, but I’m making it a golden gem. It makes more sense to me, and so that’s what I’ve set to make.
The general idea of casting things is to make a positive build of what you’re trying to make and then make a negative of it. The negative is what you cast into to make copies.
The gems were built out of wood, cut from the same original template. Each one was built using two layers, to build up the height to match the surrounding border work of the buckle itself. The central gem, however, had facets to be carved into the sides, and this proved to be the trickiest part. I had to carefully carve the sides down, and make sure the angles matched up with each side of the facet. The line of symmetry still had to be followed in the gem and any irregularity would stand out. I also took sandpaper to each side in hopes it would smooth out any noticeable curves to the carving path of the blade.
Like everything else I work on, I coated each wooden gem with PVA glue to seal the surfaces ahead of casting them. I only used two layers on the gems, one to seal and then sand smooth, and another so it has a smooth surface to mold (they’re going to be gems, after all).
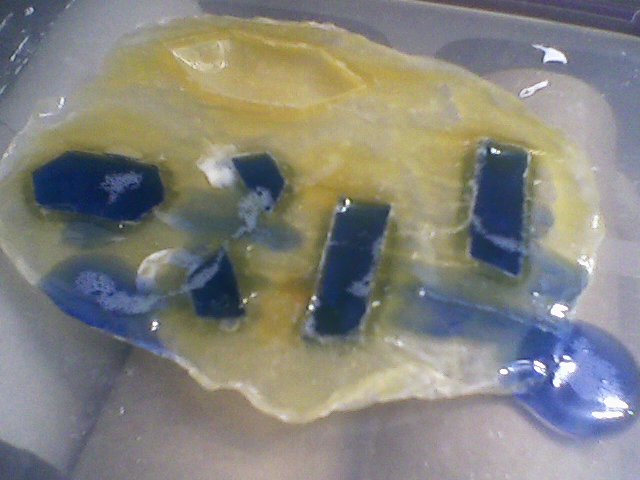
The casting material I use is a liquid latex base that smells terrible by the way. You paint it on in layers to build up rigidity. This takes a while to build a good mold.
The gems are cast using a self gassing resin. It works using a two part mixture that you have to mix in even amounts. I also bought specially designed dyes for the gem colors. I kind of used a little more dye than I needed to possibly. I’m not sure, but I wanted to make the colors bold.
The resin takes about 24 hours to fully cure. It’s really slow, but that helps to plan carefully about the shapes and how they fit. After about 12 hours (basically the morning after I poured the resin) I pulled the gems out of the mold. As they sat on the work mat and while they were still slightly soft I took my x-acto blade and trimmed the excess resin off to make flush edges.
How do I know I might have used too much dye? After about 24 hours of letting the resin fully cure, there was still a small amount of flexing like they were made out of hard jelly. This wasn’t a major issue, but rather it was just something of observation. The gems fit perfectly in their spots.
Now, something came up in my head about how they would end up looking in photography. I wanted them to shine like they really belonged on the clothing of a king. The easiest solution was the glue fresh tin foil behind the gems as a backing with the theory that any bright light in the shoot would be reflected through the gem.
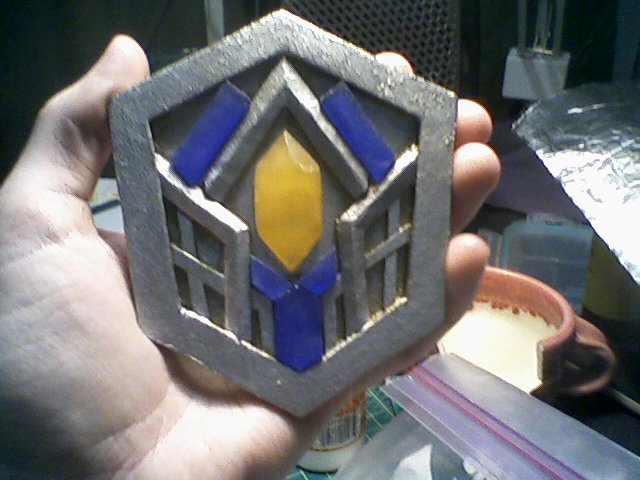
I only glued a portion of the foil behind the gems, to allow the edges of the gems to actually get glued to the buckle. After all the gems were glued, I felt pretty sure of the blue gems holding in place. They had extra parts from the buckle to keep them semi-secured. The central yellow gem was another story. It was glued, but even on the original prop there were facets around the gem to keep it in place. Or, at least looked like it was being held in.
As a temporary measure, I used snips to trim four nails down. First, to shorten their lengths so the point of the nails didn’t stick out further from behind the belt buckle. It still kept a semi sharp point, so it was still able to be hammer in gently. For visual effect, I also trimmed half the nail’s head off, so it only stuck out an arch over the gem itself. The end look isn’t quite right, but until a better solution is built, I can feel alright with how secure the gem sits.
After all the gems were glued and secured, I aligned the belt buckle to the belt and poured superglue onto the key points of the belt itself and pressed them together. Unfortunately I misaligned the buckle somehow, and had to peel it off and start over. This tore up the backside of the buckle, but it still glued right away in the correct orientation.
After wearing the belt several times, I have come to the conclusion that I should have oriented the buckle to the center of the belt, allowing the flaps to be velcroed out of sight. This is something I didn’t consider early on, as for big events I have a muscle suit to wear under the clothes in order to give myself a stockier build. It increases the girth of my stomach, which in turn makes the belt not fasten in the right spot. I don’t like that gap on the side of the buckle, since it misaligns the rest of the designs in the belt.
Step 3: Painting
 GO FORTH!
