DIAMONDBACK COSTUME TUTORIAL
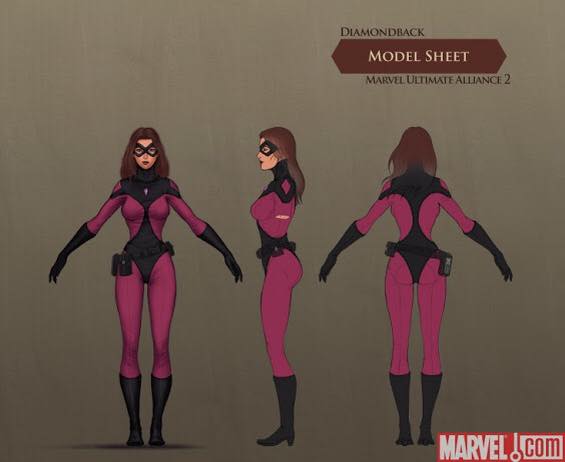
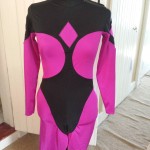
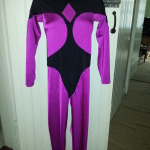
AMBER LOVE 04-DEC-2014 There’s only one person that I make costumes for other than myself and that’s my friend Panda. She’s got the perfect real world Barbie body so you can imagine how fun it is to see her wearing costumes. Her boyfriend is my friend J, who asked me to make this DIAMONDBACK costume for her for Christmas. Yes, she knows. We needed her to pick out the exact fabric because I kind of suck at interpreting comic book page colors and scans into fabric colors that are on a screen at spandexworld.com.
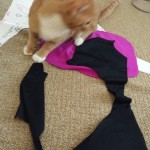
The black she chose was a Milliskin Matte Black and the pink/magenta color is called Milliskin Shiny Magenta. The pattern was based on Kwik Sew #3052 figure skating pattern as most of my superhero suits usually are. I started working out the process on November 17, 2014 and finished up today. It was important for me to pace myself and not do a full weekend marathon like I used to. I’ve been dealing with a lot of anxiety and didn’t want to mess it up. In the end, today’s final sewing construction was pretty messed up anyway. It was one of the worst zipper installations ever. I don’t have anyone to try on the suit to see how it looks so I’m hoping that it’s not horrendous.
I went through at least two yards of fabric for the white pattern pieces and probably pretty close to two yards for the pink but only about one yard for the black. I always over order because of potential mistakes in the pattern pieces. Also, if are not able to shop directly in Manhattan, you have to order by the whole yard so I end up getting 3 yards usually per color. I went through such a small amount of interfacing that I was able to use a scrap piece I found. The 20″ zipper I had in my stash of supplies from a bigger order when I bought several in different colors just to have on hand. The little of craft foam used was also from the packet of sheets that I’ve had for years.
DRAFTING Â THE PATTERN
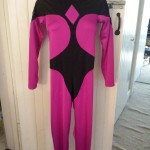
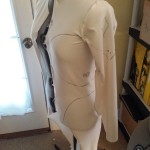
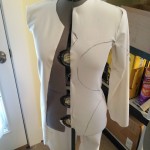
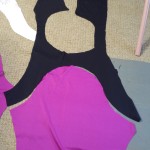
I spent only one hour drafting the pattern. It’s a two-color design, sort of like my old Rogue costume. Since I had managed to make that, I figured I could handle this. I took some leftover white spandex that was the same weight and style of the spandex to be used in the costume. I cut out the Kwik Sew pieces and pinned them to the dress form. I took a marker and made my best guesses to where the color blocks would be on a real person. Then I cut out the white spandex into those pieces. I made notes on the pieces directly which edges would need seam allowance left beyond the edge of the pattern piece.

PREPPING THE PIECES & FIRST STITCHES
Each day I spent about 1 to 2 hours.
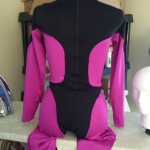
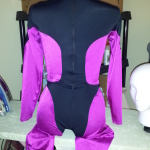
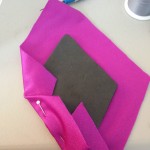
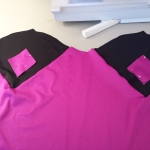
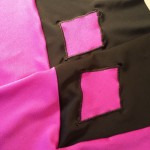
I pinned the white pieces to the actual fabric and cut them out. I laid them out to line up the edges. I also wanted to try using sheets of craft foam to make the diamonds more three dimensional. I tried cutting out 2 small diamonds for the shoulders and larger one for the chest. I glued them and hoped the glue wouldn’t be visible once dried. It was. Mistake #1. In the end, I felt that the large diamond was too big anyway. I cut out 2 new small diamonds and backed them with fusible interfacing then appliqued them to the sleeves later. As you can see, Oliver was a big help.
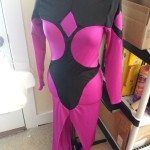
Here’s where Mistake #2 happened. I pinned the black torso piece of the left side of the body completely upside down. I had the shoulder edges attaching to the hip edges of the pink fabric. Luckily, I basted only and could rip out the stitches. After pinning it again to the dress form to see how it looked, I went over the basted seams with an overlocking stitch. Sewing on the curved parts was hard. I had to do them in sections of about four inches at a time but once basted, the final stitches were a little easier to handle.


ATTACHING THE LEFT TO THE RIGHT SIDE
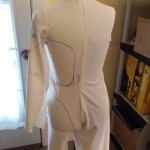
I wanted to be able to put the costume on my dress form until the last possible point so the legs weren’t done in the order of the Kwik Sew instructions. I save them for last. Instead, I attached the center front seam and the lower part of the center back seam (from the crotch to where the zipper would end). (1 hour)


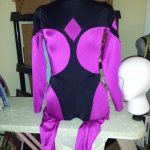
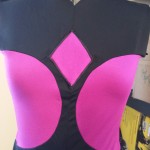
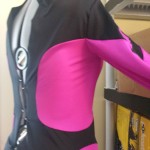
SLEEVES & CHEST
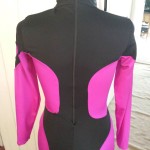
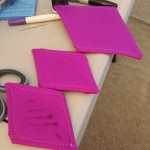
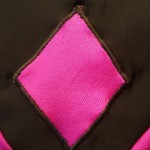
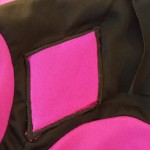
(1.5 hour) Then I made the sleeves and set them aside. The sleeves involved sewing the color block pieces together then doing the diamonds. The applique pieces (diamonds) were tacked down with some thin quarter-inch double-sided sewing tape and straight pins. I attached the chest diamond the same way only the chest diamond also had the foam in it to make it pop out. It was the one smaller one I originally made where the glue wasn’t showing through as much. As always happens with my zig-zag satin stitches that I try to get as close together as possible to give the look of embroidery, there are some gaps where the pink fabric poked through. Luckily, the base color it was black. I took a black fabric marker and dabbed at the biggest spots of pink on top of the black stitches to try and make them look a bit less obvious.
The wrists were hemmed. Then the length of each sleeve was stitched.
I attached the shoulders making them ready for the sleeves to be put in. Follow the instructions on the commercial pattern for sleeve installation. I was so pleased with how they turned out! These were the best color blocked sleeves I’ve ever done. That was Karma telling me something would go fubar and indeed, the zipper sure did.


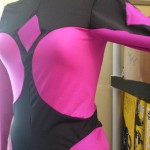
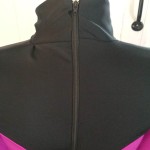
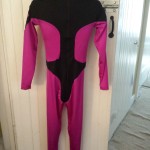
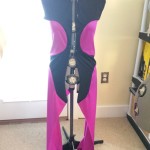
ZIPPER, COLLAR, LEGS
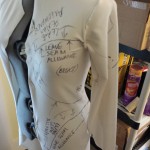
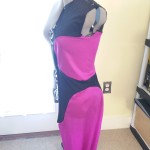
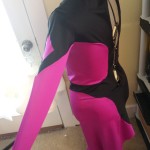
(2 hours) Mistake #3 was the absolute worst and it was the last day of construction. I installed the 20″ zipper per the instructions and it didn’t line up correctly which worries me that the color blocking pattern will now be higher on one side. It got particularly messed up at the collar which I also installed per the instructions and have done a dozen other times. Somehow, this was just not my day. I ripped out a lot of stitches and kept trying. It was improving but not looking as good as I knew it could be.
The very last step was sewing the legs at the inseam. That worked out just fine. I used black thread at the crotch since that’s where the black faux panties are then switched to pink thread for the long inseams.